Beautylabo Whip Hair Color ❤
Thank you Mr August for the wonderful month. Of course I do hope that Mr September will bring me joy and happiness throughout the whole month too. I need more good news! =(


First of all, I had my new hair makeover in this brand new month. I had my hair dyed in brown. And the results turned out to be a bit disappointing. I did not expect the colour turned out to be super light brown. Photos below might be slightly deceiving. See me in real person and you will faint straight away. T.T

Light brown.
Some part of the hair turned out to be super light brown and some are not. Stupid hair! =( And thank god that my daddy did not scold me. Daddy and mummy never encourage me to dye my hair cause they are afraid that my hair will be badly damaged. However I promised them that it will be my last time dyeing hair. =) No chance trying purple colour hair anymore. =/
So I had been waiting to try this new Beautylabo Whip Hair Colour ever since it was advertised in the Cleo magazine two months ago. I was so desperate at that time that I wanted to get it in Singapore as well. But after several considerations, I stopped the intention and decided to get it in Malaysia. And finally I get to lay my hands on this Beautylabo Whip Hair Colour! Yay!
Milky Beige.
There are 8 striking hues inspired by the latest Japanese hair trends which are Milky Beige, Sweet Brown, Bitter Chocolat, Maple Chocolat, Caramel Custard, Milk Caramalisee, Candy Pink and French Chocolat. I decided to try on the Milky Beige while my sister, Jamie Yeap tried on the Candy Pink. Both of us were having hair dye fever. LOL!
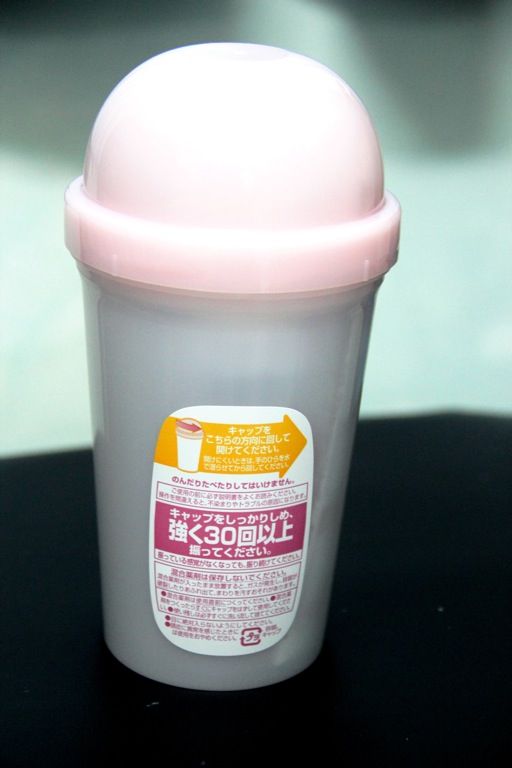
Mixing Shaker.
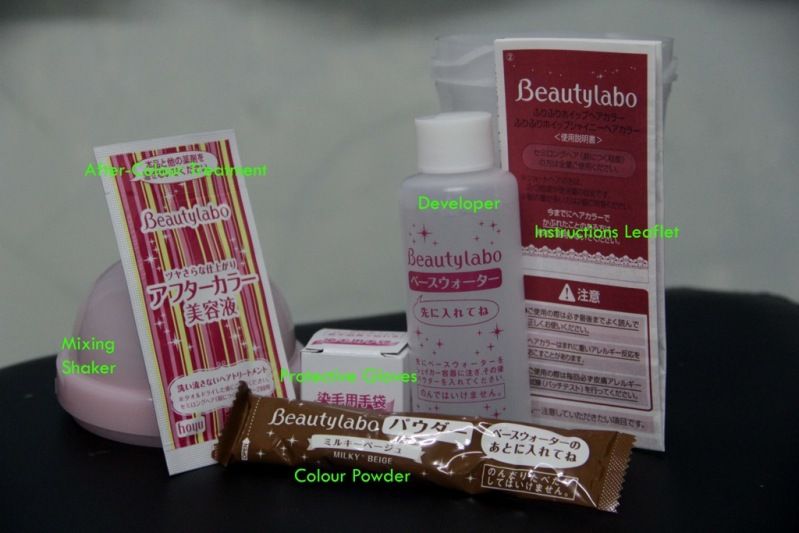
The packing comes with a mixing shaker, developer, colour powder, after-colour treatment, protective gloves and an instruction leaflet as shown below. =)
All you have to do is to remove all wrapping from the container before use. Next, follow these steps to achieve proper whipped foam. Pour the entire amount (if you have shoulder length hair or 2/3 if you have short hair) of Developer into Mixing Shaker. Then, pour in the entire amount of Colour Powder and last but not least, firmly tighten the cap. Remember to hold the Mixing Shaker in both hands and shake well with an up and down motion continuously at least 30 times. The whipped foam is DONE!
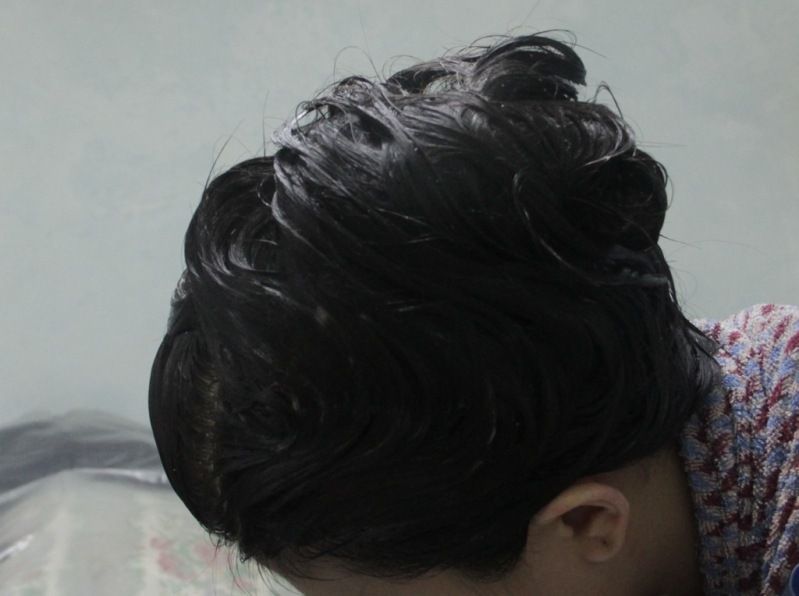
Scoop a small amount of whipped foam and gently distribute through hair starting from roots to hair ends. Once it is done, remember to gather the hair and leave to allow foam colour to develop for 30 minutes. Do NOT COMB hair while coloring as it may cause dripping. Gently massage and blend the whipped foam into hair so as not to damage hair and scalp.
Rinse the hair thoroughly with warm water until water runs clear. Shampoo twice, finishing with conditioner. After drying with a towel, put a small portion of After-Colour Treatment onto your hands and apply to the entire hair.
Bear in mind that if you would like to recolor your hair (excluding hair manicures), wait at least 1 week. Otherwise your scalp or hair may be damaged. So below are the results of my hair after dyeing. =)
My brown hair after putting on the After-Colour Treatment.
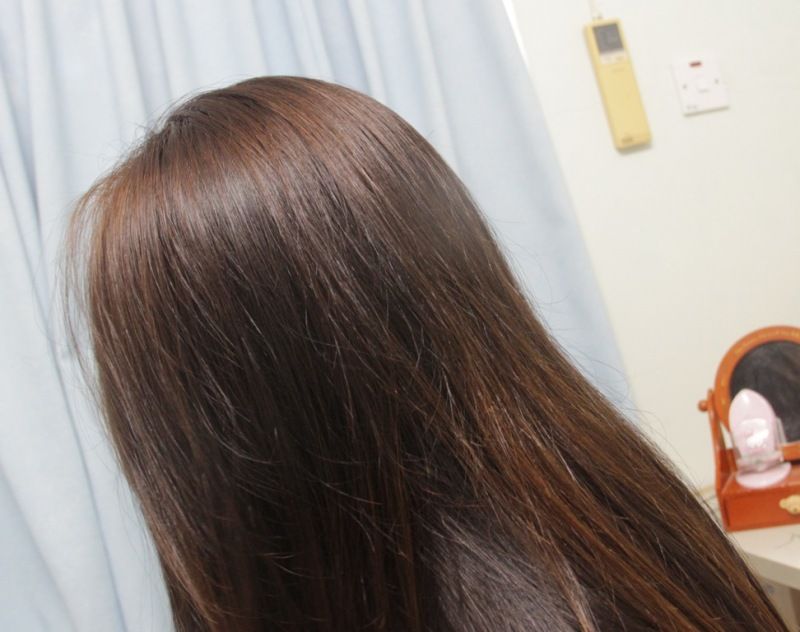
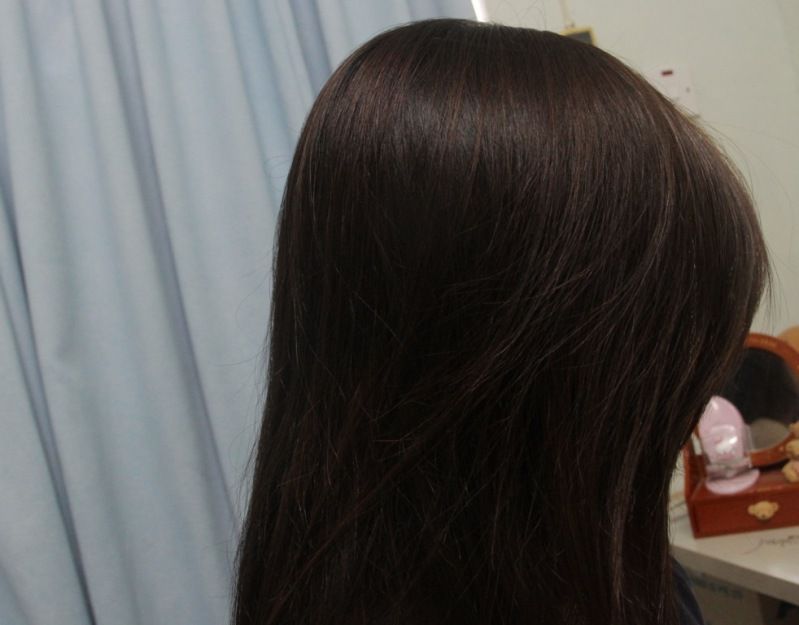
My brown hair under the direct light. ❤
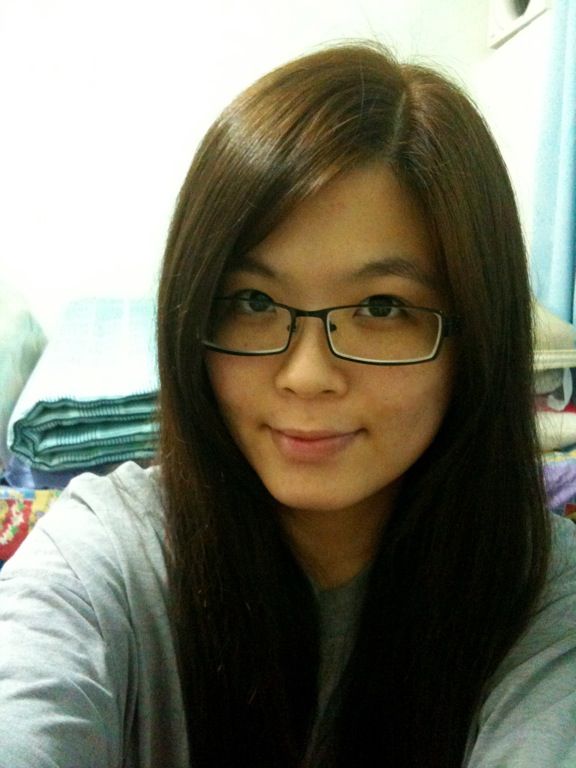
Yours truly in brand new hair makeover! ❤
P/s: This is my very first hair review. Please do support me by reading this. Thank you! Appreciate it max! ❤
lotsa love,
janiceyeap™
❤ Follow me at
Instagram - @janicemonteith
Twitter - @janicemonteith


Comments
Post a Comment
Thanks for reading =)